

• ## 📸 Photography Tips for Beginners


    Here are **10 practical photography tips** to help you take better photos:


    1. **Understand the Exposure Triangle**
    Learn how **ISO, shutter speed, and aperture** work together. These three settings control brightness, motion, and depth of field.


    2. **Use the Rule of Thirds**
    Turn on your camera's grid and place your main subject along the lines or intersection points.


    3. **Pay Attention to Light** ☀️
    Good lighting can make an average photo look professional. For portraits, try soft window light, open shade, or early-morning/evening light.


    4. **Keep Your Camera Steady**
    Hold the camera with both hands and keep your elbows close to your body. For slow shutter speeds, use a tripod.


    5. **Choose the Right Focus Point**
    For portraits, focus on the **eyes**. A sharp subject is usually more important than a perfectly exposed background.


    6. **Watch Your Background**
    Before pressing the shutter, check what's behind your subject. Remove distracting objects whenever possible.


    7. **Try Different Angles**
    Don't always shoot from eye level. Move higher, lower, closer, or to the side to find a more interesting perspective.


    8. **Use Leading Lines**
    Roads, buildings, fences, walls, and pathways can guide the viewer's eyes toward your subject.


    9. **Don't Always Center Your Subject**
    Off-center compositions can create more space and make your images feel more dynamic.


    10. **Practice Every Day** 🎯
    Take 10–20 photos daily and review them. Ask yourself: *What worked? What didn't? What would I change next time?*


    ### 🎓 Beginner Challenge


    For your next photo session, take **5 photos of the same subject**:


    * 📷 One using the Rule of Thirds
    * 📷 One from a low angle
    * 📷 One from a high angle
    * 📷 One using leading lines
    * 📷 One close-up


    Then compare them and choose your favorite.


    If you're building a photography course, I can also create **Photography Lesson 1–10**, from camera basics through **professional portrait, wedding, event, and night photography**.
    ## 📸 Photography Tips for Beginners Here are **10 practical photography tips** to help you take better photos: 1. **Understand the Exposure Triangle** Learn how **ISO, shutter speed, and aperture** work together. These three settings control brightness, motion, and depth of field. 2. **Use the Rule of Thirds** Turn on your camera's grid and place your main subject along the lines or intersection points. 3. **Pay Attention to Light** ☀️ Good lighting can make an average photo look professional. For portraits, try soft window light, open shade, or early-morning/evening light. 4. **Keep Your Camera Steady** Hold the camera with both hands and keep your elbows close to your body. For slow shutter speeds, use a tripod. 5. **Choose the Right Focus Point** For portraits, focus on the **eyes**. A sharp subject is usually more important than a perfectly exposed background. 6. **Watch Your Background** Before pressing the shutter, check what's behind your subject. Remove distracting objects whenever possible. 7. **Try Different Angles** Don't always shoot from eye level. Move higher, lower, closer, or to the side to find a more interesting perspective. 8. **Use Leading Lines** Roads, buildings, fences, walls, and pathways can guide the viewer's eyes toward your subject. 9. **Don't Always Center Your Subject** Off-center compositions can create more space and make your images feel more dynamic. 10. **Practice Every Day** 🎯 Take 10–20 photos daily and review them. Ask yourself: *What worked? What didn't? What would I change next time?* ### 🎓 Beginner Challenge For your next photo session, take **5 photos of the same subject**: * 📷 One using the Rule of Thirds * 📷 One from a low angle * 📷 One from a high angle * 📷 One using leading lines * 📷 One close-up Then compare them and choose your favorite. If you're building a photography course, I can also create **Photography Lesson 1–10**, from camera basics through **professional portrait, wedding, event, and night photography**.
    Τύπος αρχείου: jfif
    Κατέβασε
    0 Σχόλια ·0 Μοιράστηκε ·254 Views ·0 Προεπισκόπηση
  • # 📸 Photography for Beginners — Lesson 5: Portrait Photography


    Portrait photography is about more than simply photographing someone's face. The goal is to **show the person's personality, emotion, and character**.


    ## 1. Find Good Light


    **Light is the most important part of a portrait.**


    For beginners, natural window light is an excellent place to start.


    Try placing your subject near a window and position them so that the light falls gently across their face.


    Avoid extremely harsh sunlight directly overhead because it can create strong shadows under the eyes and nose.


    ### Try this:


    📷 Put your subject beside a window.


    Take one photograph with them facing the window.


    Then turn them approximately 45° away from the window.


    Compare the two photographs.


    ---


    ## 2. Focus on the Eyes 👁️


    When photographing a person, the eyes are usually the most important part of the portrait.


    Make sure the eyes are sharp and in focus.


    If your camera has **Eye AF / Eye Detection**, turn it on.


    For a close portrait, even a small focusing error can make the photograph look soft.


    ---


    ## 3. Choose Your Background Carefully


    A distracting background can ruin an otherwise excellent portrait.


    Before pressing the shutter, look behind your subject.


    Remove or avoid things such as:


    * Clutter
    * Bright objects
    * Trash
    * Random people
    * Distracting signs
    * Objects appearing to come out of the person's head


    A simple background often produces a stronger portrait.


    ---


    ## 4. Create Background Blur


    Remember what we learned about **aperture in Lesson 3**?


    A wider aperture such as:


    **f/1.8 – f/2.8**


    can produce a shallow depth of field and blur the background.


    This helps separate your subject from their surroundings.


    For example:


    **Subject:** sharp
    **Background:** soft and blurred


    This is often called **bokeh** when the out-of-focus areas have an aesthetically pleasing appearance.


    ---


    ## 5. Don't Cut People at Awkward Places


    When composing a portrait, be careful where you crop the body.


    Avoid cropping directly through areas such as:


    * Joints
    * Knees
    * Elbows


    Instead, crop between joints when appropriate.


    For a beginner, try these common portrait compositions:


    **Headshot:** Head and shoulders


    **Medium portrait:** Waist or chest upward


    **Full-body portrait:** Entire person visible


    ---


    ## 6. Give Your Subject Something to Do


    People often become uncomfortable when you simply say:


    > "Stand there and smile."


    Instead, give them a simple action.


    Ask them to:


    * Walk toward you
    * Look away from the camera
    * Adjust their clothing
    * Touch their hair
    * Sit down
    * Lean against a wall
    * Look through a window
    * Laugh naturally


    This can produce much more natural photographs.


    ---


    # 📐 7. Experiment With Camera Angles


    Try photographing the same person from different positions.


    ### Eye level


    Natural and realistic.


    ### Slightly above eye level


    Can produce a flattering perspective.


    ### Low angle


    Can make the person appear stronger or more imposing.


    ### Side angle


    Can emphasize facial shape and create a more dramatic portrait.


    Don't rely on only one angle.


    ---


    # 🎯 Lesson 5 Practical Exercise


    Find a friend or family member and take **12 portraits**.


    ### Set 1 — Lighting


    Take 3 photographs using different light directions.


    ### Set 2 — Composition


    Take:


    * 1 headshot
    * 1 medium portrait
    * 1 full-body portrait


    ### Set 3 — Background


    Take 3 photographs with different backgrounds.


    ### Set 4 — Angles


    Take 3 photographs from:


    * Eye level
    * Slightly above
    * Slightly below


    Then choose your **best 3 portraits**.


    Ask yourself:


    **1. Are the eyes sharp?**


    **2. Is the lighting flattering?**


    **3. Is the background distracting?**


    **4. Is the subject positioned well?**


    **5. Does the photograph communicate an emotion?**


    ---


    ## 🧠 Lesson 5 Key Rule


    Remember:


    > **Good portrait photography is not just about making someone look beautiful. It's about making the viewer feel something.**


    ### 📚 Next Lesson — Lesson 6


    **Photography Lighting Fundamentals: Natural Light, Artificial Light, Golden Hour, Shadows, Direction of Light, and How to Create Dramatic Photos.**
    # 📸 Photography for Beginners — Lesson 5: Portrait Photography Portrait photography is about more than simply photographing someone's face. The goal is to **show the person's personality, emotion, and character**. ## 1. Find Good Light **Light is the most important part of a portrait.** For beginners, natural window light is an excellent place to start. Try placing your subject near a window and position them so that the light falls gently across their face. Avoid extremely harsh sunlight directly overhead because it can create strong shadows under the eyes and nose. ### Try this: 📷 Put your subject beside a window. Take one photograph with them facing the window. Then turn them approximately 45° away from the window. Compare the two photographs. --- ## 2. Focus on the Eyes 👁️ When photographing a person, the eyes are usually the most important part of the portrait. Make sure the eyes are sharp and in focus. If your camera has **Eye AF / Eye Detection**, turn it on. For a close portrait, even a small focusing error can make the photograph look soft. --- ## 3. Choose Your Background Carefully A distracting background can ruin an otherwise excellent portrait. Before pressing the shutter, look behind your subject. Remove or avoid things such as: * Clutter * Bright objects * Trash * Random people * Distracting signs * Objects appearing to come out of the person's head A simple background often produces a stronger portrait. --- ## 4. Create Background Blur Remember what we learned about **aperture in Lesson 3**? A wider aperture such as: **f/1.8 – f/2.8** can produce a shallow depth of field and blur the background. This helps separate your subject from their surroundings. For example: **Subject:** sharp **Background:** soft and blurred This is often called **bokeh** when the out-of-focus areas have an aesthetically pleasing appearance. --- ## 5. Don't Cut People at Awkward Places When composing a portrait, be careful where you crop the body. Avoid cropping directly through areas such as: * Joints * Knees * Elbows Instead, crop between joints when appropriate. For a beginner, try these common portrait compositions: **Headshot:** Head and shoulders **Medium portrait:** Waist or chest upward **Full-body portrait:** Entire person visible --- ## 6. Give Your Subject Something to Do People often become uncomfortable when you simply say: > "Stand there and smile." Instead, give them a simple action. Ask them to: * Walk toward you * Look away from the camera * Adjust their clothing * Touch their hair * Sit down * Lean against a wall * Look through a window * Laugh naturally This can produce much more natural photographs. --- # 📐 7. Experiment With Camera Angles Try photographing the same person from different positions. ### Eye level Natural and realistic. ### Slightly above eye level Can produce a flattering perspective. ### Low angle Can make the person appear stronger or more imposing. ### Side angle Can emphasize facial shape and create a more dramatic portrait. Don't rely on only one angle. --- # 🎯 Lesson 5 Practical Exercise Find a friend or family member and take **12 portraits**. ### Set 1 — Lighting Take 3 photographs using different light directions. ### Set 2 — Composition Take: * 1 headshot * 1 medium portrait * 1 full-body portrait ### Set 3 — Background Take 3 photographs with different backgrounds. ### Set 4 — Angles Take 3 photographs from: * Eye level * Slightly above * Slightly below Then choose your **best 3 portraits**. Ask yourself: **1. Are the eyes sharp?** **2. Is the lighting flattering?** **3. Is the background distracting?** **4. Is the subject positioned well?** **5. Does the photograph communicate an emotion?** --- ## 🧠 Lesson 5 Key Rule Remember: > **Good portrait photography is not just about making someone look beautiful. It's about making the viewer feel something.** ### 📚 Next Lesson — Lesson 6 **Photography Lighting Fundamentals: Natural Light, Artificial Light, Golden Hour, Shadows, Direction of Light, and How to Create Dramatic Photos.**
    0 Σχόλια ·0 Μοιράστηκε ·1χλμ. Views ·0 Προεπισκόπηση
  • # 📸 Photography for Beginners — Lesson 4: Composition


    **Composition** is the way you arrange elements inside your photograph. Good composition can make an ordinary scene look much more professional.


    ## 1. Rule of Thirds


    Imagine your photograph divided into **9 equal sections** using two horizontal and two vertical lines.


    Instead of placing your subject directly in the center, try placing it where the lines intersect.


    📷 **Example:** If you're photographing a person, position their eyes around one of the upper intersections.


    **Tip:** Most cameras and smartphones allow you to turn on a **grid** to help with this.


    ---


    ## 2. Leading Lines


    Leading lines are lines that guide the viewer's eyes toward your subject.


    Examples include:


    * Roads
    * Bridges
    * Buildings
    * Fences
    * Railway tracks
    * Walls
    * Shadows


    For example, you could photograph a person standing at the end of a road, with the road leading toward them.


    **Goal:** Use lines to tell the viewer where to look.


    ---


    ## 3. Natural Framing


    Use objects around your subject to create a **frame within the photograph**.


    You can use:


    * Doors
    * Windows
    * Trees
    * Arches
    * Buildings
    * Curtains


    For example, photographing someone through a doorway can naturally draw attention to them.


    ---


    ## 4. Symmetry


    Symmetry occurs when one side of an image mirrors the other.


    Examples:


    * Architecture
    * Reflections in water
    * Long corridors
    * Roads
    * Buildings


    Symmetrical photographs can look very clean and powerful.


    ---


    ## 5. Negative Space


    **Negative space** is the empty area around your main subject.


    For example, imagine photographing a person standing on the beach with a large area of sky around them.


    The empty space makes the subject stand out.


    Don't be afraid of empty areas in your photographs. **Empty space can be part of the composition.**


    ---


    ## 6. Change Your Camera Position


    One of the easiest ways to improve your photography is to **stop taking every photograph from eye level**.


    Try:


    📷 **Low angle** — place the camera close to the ground.


    📷 **High angle** — photograph from above.


    📷 **Eye level** — natural and realistic.


    📷 **Side angle** — creates a different perspective.


    📷 **Close-up** — emphasize details.


    Before taking a photograph, ask yourself:


    > **"Can I take this from a more interesting position?"**


    ---


    # 🎯 Lesson 4 Practice


    Today, take **10 photographs**.


    Try to create:


    1. **2 Rule-of-Thirds photos**
    2. **2 Leading-Line photos**
    3. **2 Symmetry photos**
    4. **2 Natural-Framing photos**
    5. **2 Negative-Space photos**


    Don't worry about having an expensive camera.


    Your goal is to **train your eyes to see composition**.


    ### 📚 Your Assignment


    Choose your **best 3 photographs** from today's exercise and examine them.


    For each one, identify:


    * What is the main subject?
    * Where is the subject positioned?
    * What lines are visible?
    * Is there empty space?
    * What makes the viewer look at the subject?


    ---


    ### Next Lesson 📷


    **Lesson 5: Portrait Photography — How to Take Better Photos of People**


    We'll learn about **lighting, posing, camera angles, background selection, focusing on the eyes, and creating professional-looking portraits.**
    # 📸 Photography for Beginners — Lesson 4: Composition **Composition** is the way you arrange elements inside your photograph. Good composition can make an ordinary scene look much more professional. ## 1. Rule of Thirds Imagine your photograph divided into **9 equal sections** using two horizontal and two vertical lines. Instead of placing your subject directly in the center, try placing it where the lines intersect. 📷 **Example:** If you're photographing a person, position their eyes around one of the upper intersections. **Tip:** Most cameras and smartphones allow you to turn on a **grid** to help with this. --- ## 2. Leading Lines Leading lines are lines that guide the viewer's eyes toward your subject. Examples include: * Roads * Bridges * Buildings * Fences * Railway tracks * Walls * Shadows For example, you could photograph a person standing at the end of a road, with the road leading toward them. **Goal:** Use lines to tell the viewer where to look. --- ## 3. Natural Framing Use objects around your subject to create a **frame within the photograph**. You can use: * Doors * Windows * Trees * Arches * Buildings * Curtains For example, photographing someone through a doorway can naturally draw attention to them. --- ## 4. Symmetry Symmetry occurs when one side of an image mirrors the other. Examples: * Architecture * Reflections in water * Long corridors * Roads * Buildings Symmetrical photographs can look very clean and powerful. --- ## 5. Negative Space **Negative space** is the empty area around your main subject. For example, imagine photographing a person standing on the beach with a large area of sky around them. The empty space makes the subject stand out. Don't be afraid of empty areas in your photographs. **Empty space can be part of the composition.** --- ## 6. Change Your Camera Position One of the easiest ways to improve your photography is to **stop taking every photograph from eye level**. Try: 📷 **Low angle** — place the camera close to the ground. 📷 **High angle** — photograph from above. 📷 **Eye level** — natural and realistic. 📷 **Side angle** — creates a different perspective. 📷 **Close-up** — emphasize details. Before taking a photograph, ask yourself: > **"Can I take this from a more interesting position?"** --- # 🎯 Lesson 4 Practice Today, take **10 photographs**. Try to create: 1. **2 Rule-of-Thirds photos** 2. **2 Leading-Line photos** 3. **2 Symmetry photos** 4. **2 Natural-Framing photos** 5. **2 Negative-Space photos** Don't worry about having an expensive camera. Your goal is to **train your eyes to see composition**. ### 📚 Your Assignment Choose your **best 3 photographs** from today's exercise and examine them. For each one, identify: * What is the main subject? * Where is the subject positioned? * What lines are visible? * Is there empty space? * What makes the viewer look at the subject? --- ### Next Lesson 📷 **Lesson 5: Portrait Photography — How to Take Better Photos of People** We'll learn about **lighting, posing, camera angles, background selection, focusing on the eyes, and creating professional-looking portraits.**
    0 Σχόλια ·0 Μοιράστηκε ·1χλμ. Views ·0 Προεπισκόπηση
  • Absolutely. Let’s continue with **Photography for Beginners — Lesson 3**.


    # 📸 Lesson 3: Understanding Camera Exposure


    Exposure is one of the most important concepts in photography. It determines **how bright or dark your photograph appears**.


    The three main elements controlling exposure are called the **Exposure Triangle**:


    1. **Aperture**
    2. **Shutter Speed**
    3. **ISO**


    ### 1. Aperture — How Much Light Enters


    Aperture controls the size of the opening inside your lens.


    It is written as **f-numbers**, such as:


    * f/1.4
    * f/2
    * f/2.8
    * f/4
    * f/5.6
    * f/8
    * f/11
    * f/16


    **Important:** A smaller f-number means a **larger opening** and more light.


    For example:


    **f/1.8 → lots of light + blurry background**


    **f/11 → less light + more of the scene in focus**


    A wide aperture such as **f/1.8** is excellent for portraits because it can separate the person from the background.


    ---


    ### 2. Shutter Speed — How Long the Camera Captures Light


    Shutter speed determines how long your camera's shutter stays open.


    Examples:


    * 1/1000 sec → very fast
    * 1/500 sec → fast
    * 1/250 sec → moderate
    * 1/60 sec → relatively slow
    * 1 sec → very slow


    A **fast shutter speed** can freeze movement.


    📸 Example: photographing a football player running.


    A **slow shutter speed** can create motion blur.


    📸 Example: photographing moving water and creating a smooth, flowing effect.


    ---


    ### 3. ISO — Camera Sensor Sensitivity


    ISO controls how strongly your camera sensor responds to light.


    Common ISO values include:


    * ISO 100
    * ISO 200
    * ISO 400
    * ISO 800
    * ISO 1600
    * ISO 3200
    * ISO 6400


    Generally:


    **Low ISO = cleaner image**


    **High ISO = brighter image but potentially more noise/grain**


    Use ISO 100–200 when there is plenty of light.


    Use higher ISO values when you're shooting in darker environments and need to maintain a usable shutter speed.


    ---


    ## 🔺 How the Three Work Together


    Imagine you're taking a portrait outdoors.


    You choose:


    **Aperture:** f/2.8
    **Shutter:** 1/250 sec
    **ISO:** 100


    This gives you:


    * A reasonably bright image
    * A blurred background
    * Enough shutter speed to reduce camera shake and subject movement
    * Low image noise


    But if your photograph is too dark, you could:


    * Open the aperture → f/2.8 to f/2
    * Slow the shutter → 1/250 to 1/125
    * Increase ISO → 100 to 200


    The key is understanding **what you want to change creatively**, rather than simply making the image brighter.


    ---


    # 🎯 Beginner Exercise


    Take your camera or phone outside and photograph the **same subject three times**.


    ### Photo 1 — Aperture


    If your camera allows manual controls, keep ISO and shutter speed relatively constant and change the aperture.


    Try:


    **f/2.8 → f/5.6 → f/11**


    Look at how the background and overall brightness change.


    ### Photo 2 — Shutter Speed


    Photograph a moving subject using:


    **1/1000 → 1/250 → 1/30**


    Observe the difference in motion.


    ### Photo 3 — ISO


    Take the same photograph using:


    **ISO 100 → ISO 800 → ISO 3200**


    Zoom into the images and look for differences in **noise/grain**.


    ---


    ## 📝 What You Should Remember


    Think of the Exposure Triangle like this:


    **Aperture → controls light + depth of field**


    **Shutter Speed → controls light + motion**


    **ISO → controls brightness + image noise**


    Once you understand these three controls, you'll have much more creative control over your photography.


    ### Next Lesson 📷


    **Lesson 4: Composition — How to Make Your Photos Look Professional**


    We'll cover the **Rule of Thirds, leading lines, symmetry, framing, negative space, and how to position your subject**.
    Absolutely. Let’s continue with **Photography for Beginners — Lesson 3**. # 📸 Lesson 3: Understanding Camera Exposure Exposure is one of the most important concepts in photography. It determines **how bright or dark your photograph appears**. The three main elements controlling exposure are called the **Exposure Triangle**: 1. **Aperture** 2. **Shutter Speed** 3. **ISO** ### 1. Aperture — How Much Light Enters Aperture controls the size of the opening inside your lens. It is written as **f-numbers**, such as: * f/1.4 * f/2 * f/2.8 * f/4 * f/5.6 * f/8 * f/11 * f/16 **Important:** A smaller f-number means a **larger opening** and more light. For example: **f/1.8 → lots of light + blurry background** **f/11 → less light + more of the scene in focus** A wide aperture such as **f/1.8** is excellent for portraits because it can separate the person from the background. --- ### 2. Shutter Speed — How Long the Camera Captures Light Shutter speed determines how long your camera's shutter stays open. Examples: * 1/1000 sec → very fast * 1/500 sec → fast * 1/250 sec → moderate * 1/60 sec → relatively slow * 1 sec → very slow A **fast shutter speed** can freeze movement. 📸 Example: photographing a football player running. A **slow shutter speed** can create motion blur. 📸 Example: photographing moving water and creating a smooth, flowing effect. --- ### 3. ISO — Camera Sensor Sensitivity ISO controls how strongly your camera sensor responds to light. Common ISO values include: * ISO 100 * ISO 200 * ISO 400 * ISO 800 * ISO 1600 * ISO 3200 * ISO 6400 Generally: **Low ISO = cleaner image** **High ISO = brighter image but potentially more noise/grain** Use ISO 100–200 when there is plenty of light. Use higher ISO values when you're shooting in darker environments and need to maintain a usable shutter speed. --- ## 🔺 How the Three Work Together Imagine you're taking a portrait outdoors. You choose: **Aperture:** f/2.8 **Shutter:** 1/250 sec **ISO:** 100 This gives you: * A reasonably bright image * A blurred background * Enough shutter speed to reduce camera shake and subject movement * Low image noise But if your photograph is too dark, you could: * Open the aperture → f/2.8 to f/2 * Slow the shutter → 1/250 to 1/125 * Increase ISO → 100 to 200 The key is understanding **what you want to change creatively**, rather than simply making the image brighter. --- # 🎯 Beginner Exercise Take your camera or phone outside and photograph the **same subject three times**. ### Photo 1 — Aperture If your camera allows manual controls, keep ISO and shutter speed relatively constant and change the aperture. Try: **f/2.8 → f/5.6 → f/11** Look at how the background and overall brightness change. ### Photo 2 — Shutter Speed Photograph a moving subject using: **1/1000 → 1/250 → 1/30** Observe the difference in motion. ### Photo 3 — ISO Take the same photograph using: **ISO 100 → ISO 800 → ISO 3200** Zoom into the images and look for differences in **noise/grain**. --- ## 📝 What You Should Remember Think of the Exposure Triangle like this: **Aperture → controls light + depth of field** **Shutter Speed → controls light + motion** **ISO → controls brightness + image noise** Once you understand these three controls, you'll have much more creative control over your photography. ### Next Lesson 📷 **Lesson 4: Composition — How to Make Your Photos Look Professional** We'll cover the **Rule of Thirds, leading lines, symmetry, framing, negative space, and how to position your subject**.
    0 Σχόλια ·0 Μοιράστηκε ·1χλμ. Views ·0 Προεπισκόπηση
  • ## 📸 Photography for Beginners — Lesson 2: Composition


    Now that you understand the basics of the camera and exposure triangle, the next lesson is **composition**—how you arrange elements inside your photograph.


    ### 1. Rule of Thirds


    Imagine your image divided into **9 equal sections**:


    ```text
    ┌───────┬───────┬───────┐
    │ │ │ │
    ├───────┼───────┼───────┤
    │ │ 👤 │ │
    ├───────┼───────┼───────┤
    │ │ │ │
    └───────┴───────┴───────┘
    ```


    Instead of always placing your subject in the center, try placing it along one of the lines or at an intersection.


    ### 2. Leading Lines


    Use lines to guide the viewer's eyes toward your subject.


    Examples:


    * Roads
    * Bridges
    * Buildings
    * Fences
    * Staircases
    * Rivers


    ### 3. Framing


    Put something around your subject to create a natural frame.


    For example, photograph a person through:


    * A doorway
    * A window
    * Tree branches
    * An arch


    ### 4. Negative Space


    Negative space is the empty area around your subject.


    For example, if you're photographing someone looking toward the right, leave more empty space **in front of their face**.


    This gives the photograph room to breathe.


    ### 5. Fill the Frame


    Sometimes you should do the opposite—get close and remove distractions.


    For portraits, try photographing:


    * Face only
    * Face and shoulders
    * Upper body
    * Full body


    ### 6. Change Your Perspective


    Don't always photograph from eye level.


    Try:


    * **Low angle** → makes the subject feel powerful
    * **High angle** → can make the subject feel smaller
    * **Eye level** → natural and intimate
    * **Side angle** → adds depth
    * **Behind the subject** → creates storytelling


    ## 📸 Your First Assignment


    For **AskJBoss Visuals**, take **10 photographs of one person**:


    1. Center composition
    2. Rule of thirds
    3. Close-up
    4. Full body
    5. Low angle
    6. High angle
    7. Using leading lines
    8. Using natural framing
    9. With lots of negative space
    10. Creative angle


    Then choose your **best 3**.


    For each one, ask yourself:


    **“Where does my eye go first, and why?”**


    ### Next Lesson


    **Lesson 3: Understanding Light — Natural Light, Golden Hour, Shadows & Portrait Lighting.**
    ## 📸 Photography for Beginners — Lesson 2: Composition Now that you understand the basics of the camera and exposure triangle, the next lesson is **composition**—how you arrange elements inside your photograph. ### 1. Rule of Thirds Imagine your image divided into **9 equal sections**: ```text ┌───────┬───────┬───────┐ │ │ │ │ ├───────┼───────┼───────┤ │ │ 👤 │ │ ├───────┼───────┼───────┤ │ │ │ │ └───────┴───────┴───────┘ ``` Instead of always placing your subject in the center, try placing it along one of the lines or at an intersection. ### 2. Leading Lines Use lines to guide the viewer's eyes toward your subject. Examples: * Roads * Bridges * Buildings * Fences * Staircases * Rivers ### 3. Framing Put something around your subject to create a natural frame. For example, photograph a person through: * A doorway * A window * Tree branches * An arch ### 4. Negative Space Negative space is the empty area around your subject. For example, if you're photographing someone looking toward the right, leave more empty space **in front of their face**. This gives the photograph room to breathe. ### 5. Fill the Frame Sometimes you should do the opposite—get close and remove distractions. For portraits, try photographing: * Face only * Face and shoulders * Upper body * Full body ### 6. Change Your Perspective Don't always photograph from eye level. Try: * **Low angle** → makes the subject feel powerful * **High angle** → can make the subject feel smaller * **Eye level** → natural and intimate * **Side angle** → adds depth * **Behind the subject** → creates storytelling ## 📸 Your First Assignment For **AskJBoss Visuals**, take **10 photographs of one person**: 1. Center composition 2. Rule of thirds 3. Close-up 4. Full body 5. Low angle 6. High angle 7. Using leading lines 8. Using natural framing 9. With lots of negative space 10. Creative angle Then choose your **best 3**. For each one, ask yourself: **“Where does my eye go first, and why?”** ### Next Lesson **Lesson 3: Understanding Light — Natural Light, Golden Hour, Shadows & Portrait Lighting.**
    0 Σχόλια ·0 Μοιράστηκε ·1χλμ. Views ·0 Προεπισκόπηση
  • # 📸 Photography for Beginners


    If you're just starting photography, focus on **understanding light, composition, and camera settings** before worrying about expensive equipment.


    ## 1. Understand the Exposure Triangle


    The three most important camera settings are:


    ### ISO


    Controls your camera's sensitivity to light.


    * **ISO 100–200:** Bright outdoor conditions
    * **ISO 400–800:** Shade or indoors
    * **ISO 1600+:** Low-light situations


    Higher ISO lets you shoot in darker conditions but can introduce **digital noise/grain**.


    ### Aperture — f-stop


    Controls how much light enters the lens and affects background blur.


    * **f/1.4–f/2.8:** Strong background blur
    * **f/4–f/5.6:** Good for general photography
    * **f/8–f/11:** More of the scene in focus


    For portraits, try **f/2.0–f/2.8** if your lens allows it.


    ### Shutter Speed


    Controls how long the camera captures light and affects motion.


    * **1/1000:** Fast action
    * **1/500:** Sports/movement
    * **1/250:** People moving
    * **1/125:** General handheld photography
    * **1/60:** Slow movement; camera shake becomes more likely
    * **1 second+:** Requires a tripod for sharp results


    ## 2. Learn Composition


    Start with these simple techniques:


    **Rule of Thirds**
    Imagine your image divided into nine sections and place your subject along the lines or intersections.


    **Leading Lines**
    Use roads, buildings, walls, railings, or other lines to direct the viewer's eye toward your subject.


    **Negative Space**
    Leave empty space around your subject to create a cleaner, more powerful image.


    **Framing**
    Use doors, windows, trees, arches, or other objects to naturally frame your subject.


    ## 3. Learn to See Light


    Photography literally means **drawing with light**.


    Look at:


    * Direction of the light
    * Hard vs. soft light
    * Shadows
    * Highlights
    * Color temperature
    * Golden hour


    For beginners, **morning and evening light** can be much easier to work with than harsh midday sunlight.


    ## 4. Start With Portrait Photography


    Since you're developing **AskJBoss Visuals**, portraits are a great place to start.


    Try this exercise:


    **Location:** Outdoors
    **Time:** About 1 hour before sunset
    **Subject:** One person
    **Lens:** 50mm or equivalent if available
    **Aperture:** Around f/2.0–f/2.8
    **ISO:** Keep it as low as practical
    **Focus:** The person's nearest eye


    Take the same portrait from:


    1. Eye level
    2. Slightly above
    3. Slightly below
    4. Close-up
    5. Waist-up
    6. Full body


    Then compare the results.


    ## 5. Don't Buy Too Much Equipment


    You can start with:


    * Camera or smartphone
    * One good lens
    * Extra battery
    * Memory card
    * Basic tripod
    * Reflector


    You **don't need an expensive camera to learn photography**.


    The photographer's ability to understand light and composition is more important than having the most expensive equipment.


    ## 6. Practice Challenge for 30 Days


    ### Week 1 — Camera


    Practice ISO, aperture and shutter speed.


    ### Week 2 — Composition


    Take photos using rule of thirds, leading lines, framing and negative space.


    ### Week 3 — Lighting


    Photograph the same subject in morning, midday, afternoon and evening light.


    ### Week 4 — People


    Practice portraits, candid photography and storytelling.


    At the end of each week, choose your **five best photographs** and study why they worked.


    ### 📸 The most important beginner rule


    **Don't just take more photographs—study the photographs you take.**


    Ask yourself:


    > *What makes this image good? What makes it weak? Where is the light coming from? Where does my eye go first? What would I change next time?*


    That's how you develop your eye as a photographer.
    # 📸 Photography for Beginners If you're just starting photography, focus on **understanding light, composition, and camera settings** before worrying about expensive equipment. ## 1. Understand the Exposure Triangle The three most important camera settings are: ### ISO Controls your camera's sensitivity to light. * **ISO 100–200:** Bright outdoor conditions * **ISO 400–800:** Shade or indoors * **ISO 1600+:** Low-light situations Higher ISO lets you shoot in darker conditions but can introduce **digital noise/grain**. ### Aperture — f-stop Controls how much light enters the lens and affects background blur. * **f/1.4–f/2.8:** Strong background blur * **f/4–f/5.6:** Good for general photography * **f/8–f/11:** More of the scene in focus For portraits, try **f/2.0–f/2.8** if your lens allows it. ### Shutter Speed Controls how long the camera captures light and affects motion. * **1/1000:** Fast action * **1/500:** Sports/movement * **1/250:** People moving * **1/125:** General handheld photography * **1/60:** Slow movement; camera shake becomes more likely * **1 second+:** Requires a tripod for sharp results ## 2. Learn Composition Start with these simple techniques: **Rule of Thirds** Imagine your image divided into nine sections and place your subject along the lines or intersections. **Leading Lines** Use roads, buildings, walls, railings, or other lines to direct the viewer's eye toward your subject. **Negative Space** Leave empty space around your subject to create a cleaner, more powerful image. **Framing** Use doors, windows, trees, arches, or other objects to naturally frame your subject. ## 3. Learn to See Light Photography literally means **drawing with light**. Look at: * Direction of the light * Hard vs. soft light * Shadows * Highlights * Color temperature * Golden hour For beginners, **morning and evening light** can be much easier to work with than harsh midday sunlight. ## 4. Start With Portrait Photography Since you're developing **AskJBoss Visuals**, portraits are a great place to start. Try this exercise: **Location:** Outdoors **Time:** About 1 hour before sunset **Subject:** One person **Lens:** 50mm or equivalent if available **Aperture:** Around f/2.0–f/2.8 **ISO:** Keep it as low as practical **Focus:** The person's nearest eye Take the same portrait from: 1. Eye level 2. Slightly above 3. Slightly below 4. Close-up 5. Waist-up 6. Full body Then compare the results. ## 5. Don't Buy Too Much Equipment You can start with: * Camera or smartphone * One good lens * Extra battery * Memory card * Basic tripod * Reflector You **don't need an expensive camera to learn photography**. The photographer's ability to understand light and composition is more important than having the most expensive equipment. ## 6. Practice Challenge for 30 Days ### Week 1 — Camera Practice ISO, aperture and shutter speed. ### Week 2 — Composition Take photos using rule of thirds, leading lines, framing and negative space. ### Week 3 — Lighting Photograph the same subject in morning, midday, afternoon and evening light. ### Week 4 — People Practice portraits, candid photography and storytelling. At the end of each week, choose your **five best photographs** and study why they worked. ### 📸 The most important beginner rule **Don't just take more photographs—study the photographs you take.** Ask yourself: > *What makes this image good? What makes it weak? Where is the light coming from? Where does my eye go first? What would I change next time?* That's how you develop your eye as a photographer.
    0 Σχόλια ·0 Μοιράστηκε ·864 Views ·0 Προεπισκόπηση
  • # 🔥 CRAZY PRAISE — AUGUST


    ### Theme: **THANK YOU, LORD! 🙌🏽**


    ### 1. Opening — A Heart of Thanksgiving


    > I come before You today
    > And there is just one thing I just want to say:
    > **Thank You, Lord! ×4**
    >
    > With a grateful heart
    > With a song of praise
    > I come before You, Lord.


    **Build the atmosphere with spontaneous thanksgiving.**


    ### 2. I Will Sing Unto the Lord


    > I will sing unto the Lord a joyful song
    > I will praise His name
    > For the Lord is good.


    Repeat and allow the congregation to respond.


    ### 3. Too Many Reasons 🔥


    > I've got too many reasons
    > To give You praise, oh God
    > You are good! ×4


    **Leader:** You've been faithful!
    **People:** You've been good!
    **Leader:** You've kept us!
    **People:** You've been good!


    ### 4. Aba Father — He Has Done It


    > Even before I prayyy
    > **Aba Father, answer me!**
    >
    > **Tobechukwu, He has done it for me! ×4**


    Then move into spontaneous praise:


    > When you were worried and couldn't sleep
    > **Aba Father finish work for you oooh!**
    >
    > **Tobechukwu, He has done it for me!**
    >
    > See the way He answered me oooh!
    > **Tobechukwu, He has done it for me!**


    🔥 **This is where the praise can really explode.**


    ### 5. My God, Oh Mine! 🙌🏽


    > My God... oooh mine!
    > Oooh mine God...
    > You are good!
    >
    > **My God... oooh mine!
    > Oooh mine God...
    > You are good!**


    Repeat faster and encourage everyone to dance.


    ### 6. Oga O — O Tobi


    > **Oga O! O Tobi!**
    > Oga Eledumare
    > Ga ju aiye lo!
    >
    > **Oga oooh! O Tobi!
    > Oga Eledumare
    > Ga ju gbogbo aiye lo!**


    ### 7. Finale — Praise the Lord 🔥🔥


    > **Praise the Lord!**
    > Praise the Lord!
    >
    > **Praiseeeee the Lord!
    > Praise the Lord!**
    >
    > He has done great things!
    > He has done mighty things!
    > He has been faithful to us!
    >
    > **Praiseeeee the Lord!
    > Praise the Lord!**


    ### 🔥 PRAISE FLOW


    **THANK YOU LORD → I WILL SING → TOO MANY REASONS → ABA FATHER → TOBECHUKWU → MY GOD → OGA O → PRAISE THE LORD**


    The flow moves from **quiet thanksgiving → joyful praise → testimony → high-energy African praise → celebration**.
    # 🔥 CRAZY PRAISE — AUGUST ### Theme: **THANK YOU, LORD! 🙌🏽** ### 1. Opening — A Heart of Thanksgiving > I come before You today > And there is just one thing I just want to say: > **Thank You, Lord! ×4** > > With a grateful heart > With a song of praise > I come before You, Lord. **Build the atmosphere with spontaneous thanksgiving.** ### 2. I Will Sing Unto the Lord > I will sing unto the Lord a joyful song > I will praise His name > For the Lord is good. Repeat and allow the congregation to respond. ### 3. Too Many Reasons 🔥 > I've got too many reasons > To give You praise, oh God > You are good! ×4 **Leader:** You've been faithful! **People:** You've been good! **Leader:** You've kept us! **People:** You've been good! ### 4. Aba Father — He Has Done It > Even before I prayyy > **Aba Father, answer me!** > > **Tobechukwu, He has done it for me! ×4** Then move into spontaneous praise: > When you were worried and couldn't sleep > **Aba Father finish work for you oooh!** > > **Tobechukwu, He has done it for me!** > > See the way He answered me oooh! > **Tobechukwu, He has done it for me!** 🔥 **This is where the praise can really explode.** ### 5. My God, Oh Mine! 🙌🏽 > My God... oooh mine! > Oooh mine God... > You are good! > > **My God... oooh mine! > Oooh mine God... > You are good!** Repeat faster and encourage everyone to dance. ### 6. Oga O — O Tobi > **Oga O! O Tobi!** > Oga Eledumare > Ga ju aiye lo! > > **Oga oooh! O Tobi! > Oga Eledumare > Ga ju gbogbo aiye lo!** ### 7. Finale — Praise the Lord 🔥🔥 > **Praise the Lord!** > Praise the Lord! > > **Praiseeeee the Lord! > Praise the Lord!** > > He has done great things! > He has done mighty things! > He has been faithful to us! > > **Praiseeeee the Lord! > Praise the Lord!** ### 🔥 PRAISE FLOW **THANK YOU LORD → I WILL SING → TOO MANY REASONS → ABA FATHER → TOBECHUKWU → MY GOD → OGA O → PRAISE THE LORD** The flow moves from **quiet thanksgiving → joyful praise → testimony → high-energy African praise → celebration**.
    0 Σχόλια ·0 Μοιράστηκε ·480 Views ·0 Προεπισκόπηση
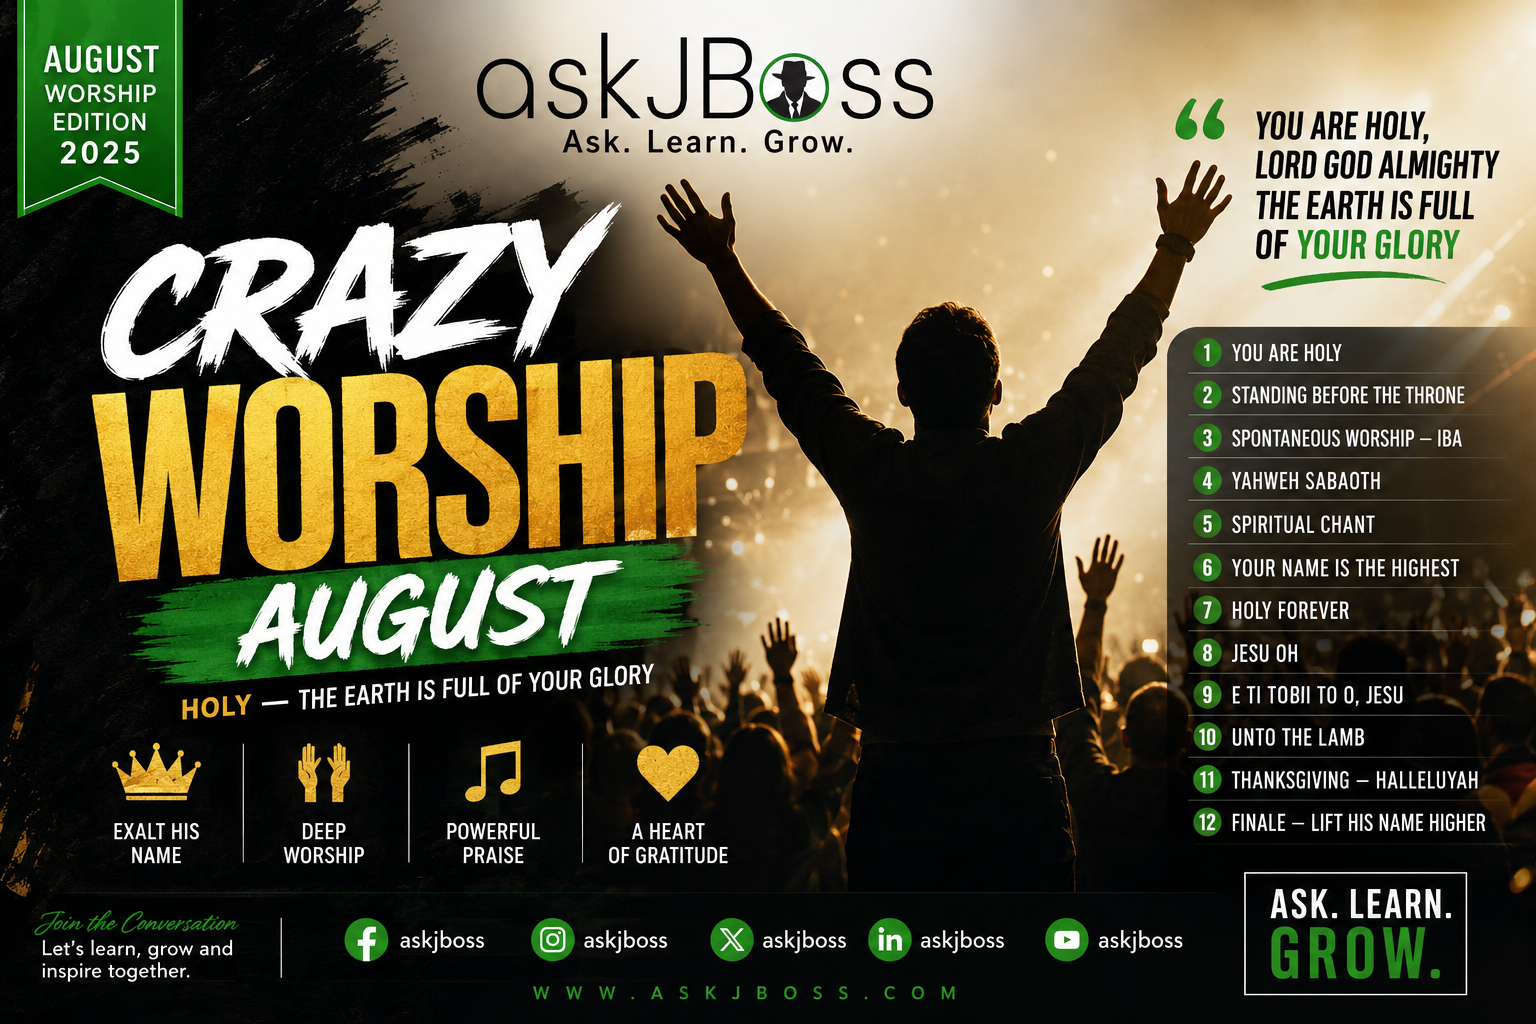
  • Here’s a clean, organized “Crazy Worship – August” worship flow, while keeping your repetitions and spontaneous worship sections.

    # 🔥 CRAZY WORSHIP — AUGUST

    ### Theme: **HOLY — THE EARTH IS FULL OF YOUR GLORY**

    ### 1. Opening — You Are Holy

    > You are holy, Lord God Almighty
    > The earth is full of Your glory.

    Repeat and build gradually.

    ### 2. Standing Before the Throne

    > Standing before the throne, there are no words to say
    > But **Holy, Holy, Holy** ×8
    >
    > You are holy, Lord God Almighty
    > The earth is full of Your glory ×9

    ### 3. Spontaneous Worship — Iba

    > You are eminently glorious
    > Immaculately beautiful
    > We can go on and on, on and on, on and on
    > But my words are not enough
    > My vocabulary will fail me
    > Permit me to cry out...
    >
    > **Iba oooh, ibaaa!** ×12 🔥

    ### 4. Yahweh Sabaoth

    > The Lord of Hosts
    > The King of Glory
    >
    > **Yahweh Sabaoth ×2**

    Allow the worship to flow spontaneously here.

    ### 5. Spiritual Chant

    > **Tiririri riririr
    > Tiri riririri...**

    Build the atmosphere before moving into the next song.

    ### 6. Your Name Is the Highest

    > Your name is the highest
    > Your name is the greatest
    > Your name stands above them all
    >
    > All thrones and dominions
    > And power and positions
    > Your name stands above them all.

    ### 7. Holy Forever

    > And the angels cry: **Holy**
    > All creation bow: **Holy**
    > You will always be: **Holy**
    > **Holy forever.**

    This can be a strong congregational worship moment.

    ### 8. Jesu Oh

    > Jesu oh, oh Jesu
    > Oloruko Aperire
    > Jesu oh ×2
    >
    > **Jesuu ooooh Jesu ×7**

    ### 9. E Ti Tobi To O, Jesu

    > Gbogbo aye n wariri ni oruko Re
    > Won n k'orin:
    > **E ti tobi to o, Jesu**
    >
    > Awon orun na n s'eleri
    > Won n f'oribale niwaju ite Re o
    > **E ti tobi to o, Jesu**
    >
    > **E ti tobi to o
    > Oh oh oh oh Oluwa wa
    > E ti tobi to o, Jesu**

    ### 10. Unto the Lamb

    > Unto the Lamb upon the throne
    > We raise a sound ×2
    > For You are God and God alone.
    >
    > **Hallelujah! Hallelujah!**

    ### 11. Thanksgiving — Halleluyah

    > **Halleluyah eeee, eee, eee ×2**
    > We are grateful
    > **Eeeh, eeeh, eeeeh!**

    Let the congregation respond freely here.

    ### 12. Finale — Lift His Name Higher 🔥

    > We lift Your name
    > **Higher! Higher! Higher!**
    >
    > Shout Halle!
    > **Hallelujah! Hallelujah! Hallelujah!**

    ## 🔥 Suggested Worship Progression

    **HOLY → THRONE → IBA → YAHWEH SABAOTH → CHANT → HIS NAME → HOLY FOREVER → JESU → E TI TOBI → THE LAMB → HALLELUJAH → HIGHER**

    This gives you a natural progression from **deep reverence → spiritual intensity → celebration and thanksgiving**.
    Here’s a clean, organized “Crazy Worship – August” worship flow, while keeping your repetitions and spontaneous worship sections. # 🔥 CRAZY WORSHIP — AUGUST ### Theme: **HOLY — THE EARTH IS FULL OF YOUR GLORY** ### 1. Opening — You Are Holy > You are holy, Lord God Almighty > The earth is full of Your glory. Repeat and build gradually. ### 2. Standing Before the Throne > Standing before the throne, there are no words to say > But **Holy, Holy, Holy** ×8 > > You are holy, Lord God Almighty > The earth is full of Your glory ×9 ### 3. Spontaneous Worship — Iba > You are eminently glorious > Immaculately beautiful > We can go on and on, on and on, on and on > But my words are not enough > My vocabulary will fail me > Permit me to cry out... > > **Iba oooh, ibaaa!** ×12 🔥 ### 4. Yahweh Sabaoth > The Lord of Hosts > The King of Glory > > **Yahweh Sabaoth ×2** Allow the worship to flow spontaneously here. ### 5. Spiritual Chant > **Tiririri riririr > Tiri riririri...** Build the atmosphere before moving into the next song. ### 6. Your Name Is the Highest > Your name is the highest > Your name is the greatest > Your name stands above them all > > All thrones and dominions > And power and positions > Your name stands above them all. ### 7. Holy Forever > And the angels cry: **Holy** > All creation bow: **Holy** > You will always be: **Holy** > **Holy forever.** This can be a strong congregational worship moment. ### 8. Jesu Oh > Jesu oh, oh Jesu > Oloruko Aperire > Jesu oh ×2 > > **Jesuu ooooh Jesu ×7** ### 9. E Ti Tobi To O, Jesu > Gbogbo aye n wariri ni oruko Re > Won n k'orin: > **E ti tobi to o, Jesu** > > Awon orun na n s'eleri > Won n f'oribale niwaju ite Re o > **E ti tobi to o, Jesu** > > **E ti tobi to o > Oh oh oh oh Oluwa wa > E ti tobi to o, Jesu** ### 10. Unto the Lamb > Unto the Lamb upon the throne > We raise a sound ×2 > For You are God and God alone. > > **Hallelujah! Hallelujah!** ### 11. Thanksgiving — Halleluyah > **Halleluyah eeee, eee, eee ×2** > We are grateful > **Eeeh, eeeh, eeeeh!** Let the congregation respond freely here. ### 12. Finale — Lift His Name Higher 🔥 > We lift Your name > **Higher! Higher! Higher!** > > Shout Halle! > **Hallelujah! Hallelujah! Hallelujah!** ## 🔥 Suggested Worship Progression **HOLY → THRONE → IBA → YAHWEH SABAOTH → CHANT → HIS NAME → HOLY FOREVER → JESU → E TI TOBI → THE LAMB → HALLELUJAH → HIGHER** This gives you a natural progression from **deep reverence → spiritual intensity → celebration and thanksgiving**.
    0 Σχόλια ·0 Μοιράστηκε ·360 Views ·0 Προεπισκόπηση
  • AskJBoss Visuals is my creative photography and visual storytelling brand. I started it because I’ve always been passionate about capturing people, moments, and stories through photography. I enjoy turning ordinary moments into memorable images, with a focus on portraits, lifestyle, events, fashion, and creative photography.
    AskJBoss Visuals is my creative photography and visual storytelling brand. I started it because I’ve always been passionate about capturing people, moments, and stories through photography. I enjoy turning ordinary moments into memorable images, with a focus on portraits, lifestyle, events, fashion, and creative photography.
    0 Σχόλια ·0 Μοιράστηκε ·352 Views ·0 Προεπισκόπηση
  • #AskJBOSS, #AskJBOSSMarketplace, #BuySellConnect, #OnlineMarketplace, #NigeriaMarketplace, #NigerianMarketplace, #BuyAndSell, #ShopOnline, #SellOnline, #OnlineShopping, #GreatDeals, #BestDeals, #AffordableDeals, #TrustedSellers, #BuyInNigeria, #SellInNigeria, #NaijaBusiness, #NaijaMarket, #NigeriaBusiness, #SmallBusinessNigeria, #NigerianBusinesses, #EntrepreneursNigeria, #BusinessNigeria, #OnlineBusiness, #EcommerceNigeria, #Ecommerce, #Marketplace, #LocalMarketplace, #ShopNigeria, #SupportLocalBusiness, #MadeInNigeria, #DealsNigeria, #ProductsNigeria, #ServicesNigeria, #ClassifiedAds, #FreeMarketplace, #DigitalMarketplace, #ShoppingNigeria, #BuySellNigeria, #AskJBOSScom
    #AskJBOSS, #AskJBOSSMarketplace, #BuySellConnect, #OnlineMarketplace, #NigeriaMarketplace, #NigerianMarketplace, #BuyAndSell, #ShopOnline, #SellOnline, #OnlineShopping, #GreatDeals, #BestDeals, #AffordableDeals, #TrustedSellers, #BuyInNigeria, #SellInNigeria, #NaijaBusiness, #NaijaMarket, #NigeriaBusiness, #SmallBusinessNigeria, #NigerianBusinesses, #EntrepreneursNigeria, #BusinessNigeria, #OnlineBusiness, #EcommerceNigeria, #Ecommerce, #Marketplace, #LocalMarketplace, #ShopNigeria, #SupportLocalBusiness, #MadeInNigeria, #DealsNigeria, #ProductsNigeria, #ServicesNigeria, #ClassifiedAds, #FreeMarketplace, #DigitalMarketplace, #ShoppingNigeria, #BuySellNigeria, #AskJBOSScom
    0 Σχόλια ·0 Μοιράστηκε ·2χλμ. Views ·0 Προεπισκόπηση
  • ## 🔥 Trending Ways to Make Money in August 2026


    If you're looking for **realistic ways to make extra income in Nigeria this August**, these are some of the strongest opportunities getting attention right now. Current Nigerian side-hustle coverage particularly highlights freelancing, AI-enabled services, e-commerce, UGC/content creation, affiliate marketing, social-media services, and digital products. ([Money.ng][1])


    ### 💰 10 Money-Making Methods to Try This August


    1. **🤖 AI-Powered Freelancing**
    Use AI to deliver writing, graphic design, video editing, research, SEO, presentations and marketing services faster.


    2. **📱 UGC & Short-Form Video Creation**
    Create TikTok, Instagram Reels and product videos for businesses. UGC is particularly attractive because you can earn from creating content without needing a huge following. ([Nairametrics][2])


    3. **🛒 Social Media E-commerce**
    Sell fashion, beauty products, electronics, food, accessories or other niche products through WhatsApp, Instagram and TikTok. E-commerce remains one of the more scalable options highlighted for Nigerian professionals. ([Nairametrics][2])


    4. **💻 Freelance Digital Services**
    Offer website design, digital marketing, SEO, graphic design, copywriting, virtual assistance or social-media management to local and international clients. ([Money.ng][1])


    5. **🎯 Affiliate Marketing**
    Promote useful products or services and earn a commission when people purchase through your referral.


    6. **📚 Sell Digital Products**
    Create ebooks, Canva templates, business templates, courses, CV templates, guides or other downloadable products.


    7. **📲 WhatsApp Business Services**
    Help businesses create catalogs, manage WhatsApp inquiries, advertise products and convert status viewers into customers.


    8. **🎥 Faceless YouTube/TikTok Content**
    Build educational, entertainment, finance, relationship, technology or storytelling channels using original content and AI-assisted production. Monetization takes time, so avoid “instant income” claims.


    9. **🧠 AI Automation for Small Businesses**
    Set up automated customer replies, appointment systems, lead collection, follow-ups and other workflows for businesses. AI automation and no-code services are attracting significant interest among entrepreneurs and freelancers. ([Reddit][3])


    10. **🎓 Online Tutoring & Coaching**
    Teach English, IELTS, mathematics, coding, design, marketing or another skill you already know.


    ### 🚀 Best 3 to Start With Little Capital


    **If you have a smartphone + internet:**
    **UGC + affiliate marketing + digital services**


    **If you have a marketable skill:**
    **AI-assisted freelancing + international clients**


    **If you have some startup capital:**
    **Niche e-commerce + social-media marketing**


    > **Important:** There is no guaranteed “quick money” method. Sustainable online income generally comes from providing a useful service/product, building trust and consistently finding customers—not from paying for secret money-making schemes. ([Brands.Ng][4])


    ### 🔥 Hashtags


    #MakeMoneyOnline #MakeMoneyInNigeria #MoneyMakingTips #SideHustleNigeria #NigeriaBusiness #OnlineBusiness #SideHustle #August2026 #MakeMoney #Entrepreneurship #BusinessIdeas #BusinessNigeria #DigitalBusiness #DigitalMarketing #Freelancing #FreelancerNigeria #AIForBusiness #AITools #AIFreelancing #ContentCreation #UGCCreator #TikTokNigeria #InstagramBusiness #WhatsAppBusiness #AffiliateMarketing #EcommerceNigeria #OnlineJobs #RemoteWork #PassiveIncome #FinancialFreedom #HustleNigeria #YoungEntrepreneurs #SMEsNigeria #EarnOnline #WorkFromHome
    ## 🔥 Trending Ways to Make Money in August 2026 If you're looking for **realistic ways to make extra income in Nigeria this August**, these are some of the strongest opportunities getting attention right now. Current Nigerian side-hustle coverage particularly highlights freelancing, AI-enabled services, e-commerce, UGC/content creation, affiliate marketing, social-media services, and digital products. ([Money.ng][1]) ### 💰 10 Money-Making Methods to Try This August 1. **🤖 AI-Powered Freelancing** Use AI to deliver writing, graphic design, video editing, research, SEO, presentations and marketing services faster. 2. **📱 UGC & Short-Form Video Creation** Create TikTok, Instagram Reels and product videos for businesses. UGC is particularly attractive because you can earn from creating content without needing a huge following. ([Nairametrics][2]) 3. **🛒 Social Media E-commerce** Sell fashion, beauty products, electronics, food, accessories or other niche products through WhatsApp, Instagram and TikTok. E-commerce remains one of the more scalable options highlighted for Nigerian professionals. ([Nairametrics][2]) 4. **💻 Freelance Digital Services** Offer website design, digital marketing, SEO, graphic design, copywriting, virtual assistance or social-media management to local and international clients. ([Money.ng][1]) 5. **🎯 Affiliate Marketing** Promote useful products or services and earn a commission when people purchase through your referral. 6. **📚 Sell Digital Products** Create ebooks, Canva templates, business templates, courses, CV templates, guides or other downloadable products. 7. **📲 WhatsApp Business Services** Help businesses create catalogs, manage WhatsApp inquiries, advertise products and convert status viewers into customers. 8. **🎥 Faceless YouTube/TikTok Content** Build educational, entertainment, finance, relationship, technology or storytelling channels using original content and AI-assisted production. Monetization takes time, so avoid “instant income” claims. 9. **🧠 AI Automation for Small Businesses** Set up automated customer replies, appointment systems, lead collection, follow-ups and other workflows for businesses. AI automation and no-code services are attracting significant interest among entrepreneurs and freelancers. ([Reddit][3]) 10. **🎓 Online Tutoring & Coaching** Teach English, IELTS, mathematics, coding, design, marketing or another skill you already know. ### 🚀 Best 3 to Start With Little Capital **If you have a smartphone + internet:** **UGC + affiliate marketing + digital services** **If you have a marketable skill:** **AI-assisted freelancing + international clients** **If you have some startup capital:** **Niche e-commerce + social-media marketing** > **Important:** There is no guaranteed “quick money” method. Sustainable online income generally comes from providing a useful service/product, building trust and consistently finding customers—not from paying for secret money-making schemes. ([Brands.Ng][4]) ### 🔥 Hashtags #MakeMoneyOnline #MakeMoneyInNigeria #MoneyMakingTips #SideHustleNigeria #NigeriaBusiness #OnlineBusiness #SideHustle #August2026 #MakeMoney #Entrepreneurship #BusinessIdeas #BusinessNigeria #DigitalBusiness #DigitalMarketing #Freelancing #FreelancerNigeria #AIForBusiness #AITools #AIFreelancing #ContentCreation #UGCCreator #TikTokNigeria #InstagramBusiness #WhatsAppBusiness #AffiliateMarketing #EcommerceNigeria #OnlineJobs #RemoteWork #PassiveIncome #FinancialFreedom #HustleNigeria #YoungEntrepreneurs #SMEsNigeria #EarnOnline #WorkFromHome
    0 Σχόλια ·0 Μοιράστηκε ·2χλμ. Views ·0 Προεπισκόπηση
  • POF clone and custom design dating website scriot

    ₦890.00
    0.0 (0 Προεπισκόπηση)
    Here are screenshots of all 13 pages, each presented above with a short description:
    1. Discover — profile browsing with stats, badges, and ads
    2. Matches — mutual connections and recent conversations
    3. Messaging — chat with daily free credits
    4. Profile page — bio, interests, clickable location, report option
    5. Activity — matches, messages, likes, and views feed
    6. Who Liked You — Premium-locked admirers view
    7. Premium — plans and benefits, paid via Paystack
    8. Settings — profile, match preference, verification, credits
    9. Edit profile — photo and details with completeness meter
    10. Contact us / 11. Advertise with us — enquiry forms
    11. Registration — multi-step sign-up
    12. Admin login — PIN-protected admin access


    # Meetwell — App Overview

    Meetwell is a dating web application focused on thoughtful, quality connections. Below is a full list of its features and the technology it is built with.

    ---

    ## Features

    ### For Members

    **Discover page**
    Browse member profiles with photos, age, city, bio, interests, and a compatibility score. Profiles load in pages ("View more") and are filtered by your match preference.

    **Gender preference matching**
    Set your own gender and choose who you'd like to see: the opposite gender (default) or everyone. Discover and match suggestions respect this automatically.

    **Matches & Liked You**
    See your mutual matches and the members who have liked your profile.

    **Messaging with daily credits**
    Chat with your matches. Free members get a daily set of message credits that refresh every day; the app prompts you to get more when you run low.

    **Premium membership**
    Upgrade to a paid Premium plan (via Paystack payment). Premium members get an ad-free experience and a Premium badge on their profile. Multiple plan durations are supported.

    **Virtual gifts**
    Send a paid virtual gift to another member with a personal message (paid via Paystack).

    **Profile verification**
    Request a "verified" badge. An admin reviews the request and approves or declines it; the member is notified by email either way.

    **Profile pages**
    Each member has a full profile page with photo, bio, interests, similar-profiles suggestions, a clickable location (opens Google Maps), and a "Report this profile" option.

    **Registration & welcome email**
    New members register with their details and receive an automatic welcome email.

    **Contact & Advertise pages**
    "Contact us" and "Advertise with us" forms, with automatic acknowledgement emails to the sender.

    **Activity feed & notifications**
    Members see recent activity: new matches, messages, likes, and profile views.

    ### For the Admin

    **PIN-protected admin panel**
    A private admin area protected by a PIN (each login is logged and reported).

    **Member management**
    View all members, delete members, grant Premium days, and review verification requests (approve/decline).

    **Admin notifications**
    An in-app notification feed records new registrations, payments, reported profiles, contact/advertise form submissions, and admin logins. Optionally, these are also emailed to an admin email address.

    **Editable email templates**
    Six email templates (welcome, payment receipt, verification approved/declined, contact acknowledgement, admin alert) can be edited or switched off from the admin panel, using placeholders like `{{name}}`.

    **Settings**
    Configure the admin notification email and other app settings.

    ---

    ## Technology Used

    | Part | Program / Service | What it does |
    |---|---|---|
    | Frontend (what users see) | **React** with **Vite** | Builds the website pages — Discover, profiles, settings, admin panel, etc. |
    | Page navigation | **Wouter** | Moves between pages (e.g. /discover, /settings) without reloading. |
    | Styling | **Tailwind CSS** | The visual design — colors, layout, typography. |
    | Backend (the server) | **Node.js** with **Express** | Handles all requests: profiles, matches, messages, payments, admin actions. |
    | Language | **TypeScript** | The programming language used for both frontend and backend (JavaScript with type-safety). |
    | Database | **PostgreSQL** | Stores all data: profiles, members, matches, messages, gifts, notifications, templates, settings. |
    | Database toolkit | **Drizzle ORM** | How the code reads and writes the database safely. |
    | Payments | **Paystack** | Processes Premium subscriptions and gift purchases. |
    | Emails | **Resend** | Sends all automatic emails (welcome, receipts, verification results, admin alerts). |
    | File storage | **Replit App Storage (object storage)** | Stores uploaded images such as profile photos. |
    | Hosting & publishing | **Replit** | Runs the app and its database; the Publish button puts it live on the internet. |
    | Project structure | **pnpm monorepo** | Keeps the frontend, backend, and shared database code organized in one project. |

    ---

    ## How it fits together

    1. A visitor opens the website (**React** frontend).
    2. The pages request data from the **Express** server (e.g. "give me profiles to show").
    3. The server reads/writes the **PostgreSQL** database and returns the data.
    4. Payments go through **Paystack**; emails go out through **Resend**.
    5. When published on Replit, all of this runs automatically with a production database — no manual setup needed.


    That's the admin PIN — a password that protects your admin panel (screenshot 13 above).
    The admin panel at /admin is where you manage the app: members, verification requests, notifications, email templates, and settings. Since only you should access it, it asks for a PIN before letting anyone in.
    Your current PIN is: meetwell-admin
    Type that into the "Enter admin PIN" box and press Enter to get in. Regular users of your dating site never see this page — it's just for you.
    One heads-up: this PIN is currently written into the code, which isn't ideal for security once the app is live. There's already a task on your list (#8) to move it into a proper secret so it can't be guessed or found — worth doing before you launch.
    Here are screenshots of all 13 pages, each presented above with a short description: 1. Discover — profile browsing with stats, badges, and ads 2. Matches — mutual connections and recent conversations 3. Messaging — chat with daily free credits 4. Profile page — bio, interests, clickable location, report option 5. Activity — matches, messages, likes, and views feed 6. Who Liked You — Premium-locked admirers view 7. Premium — plans and benefits, paid via Paystack 8. Settings — profile, match preference, verification, credits 9. Edit profile — photo and details with completeness meter 10. Contact us / 11. Advertise with us — enquiry forms 11. Registration — multi-step sign-up 12. Admin login — PIN-protected admin access # Meetwell — App Overview Meetwell is a dating web application focused on thoughtful, quality connections. Below is a full list of its features and the technology it is built with. --- ## Features ### For Members **Discover page** Browse member profiles with photos, age, city, bio, interests, and a compatibility score. Profiles load in pages ("View more") and are filtered by your match preference. **Gender preference matching** Set your own gender and choose who you'd like to see: the opposite gender (default) or everyone. Discover and match suggestions respect this automatically. **Matches & Liked You** See your mutual matches and the members who have liked your profile. **Messaging with daily credits** Chat with your matches. Free members get a daily set of message credits that refresh every day; the app prompts you to get more when you run low. **Premium membership** Upgrade to a paid Premium plan (via Paystack payment). Premium members get an ad-free experience and a Premium badge on their profile. Multiple plan durations are supported. **Virtual gifts** Send a paid virtual gift to another member with a personal message (paid via Paystack). **Profile verification** Request a "verified" badge. An admin reviews the request and approves or declines it; the member is notified by email either way. **Profile pages** Each member has a full profile page with photo, bio, interests, similar-profiles suggestions, a clickable location (opens Google Maps), and a "Report this profile" option. **Registration & welcome email** New members register with their details and receive an automatic welcome email. **Contact & Advertise pages** "Contact us" and "Advertise with us" forms, with automatic acknowledgement emails to the sender. **Activity feed & notifications** Members see recent activity: new matches, messages, likes, and profile views. ### For the Admin **PIN-protected admin panel** A private admin area protected by a PIN (each login is logged and reported). **Member management** View all members, delete members, grant Premium days, and review verification requests (approve/decline). **Admin notifications** An in-app notification feed records new registrations, payments, reported profiles, contact/advertise form submissions, and admin logins. Optionally, these are also emailed to an admin email address. **Editable email templates** Six email templates (welcome, payment receipt, verification approved/declined, contact acknowledgement, admin alert) can be edited or switched off from the admin panel, using placeholders like `{{name}}`. **Settings** Configure the admin notification email and other app settings. --- ## Technology Used | Part | Program / Service | What it does | |---|---|---| | Frontend (what users see) | **React** with **Vite** | Builds the website pages — Discover, profiles, settings, admin panel, etc. | | Page navigation | **Wouter** | Moves between pages (e.g. /discover, /settings) without reloading. | | Styling | **Tailwind CSS** | The visual design — colors, layout, typography. | | Backend (the server) | **Node.js** with **Express** | Handles all requests: profiles, matches, messages, payments, admin actions. | | Language | **TypeScript** | The programming language used for both frontend and backend (JavaScript with type-safety). | | Database | **PostgreSQL** | Stores all data: profiles, members, matches, messages, gifts, notifications, templates, settings. | | Database toolkit | **Drizzle ORM** | How the code reads and writes the database safely. | | Payments | **Paystack** | Processes Premium subscriptions and gift purchases. | | Emails | **Resend** | Sends all automatic emails (welcome, receipts, verification results, admin alerts). | | File storage | **Replit App Storage (object storage)** | Stores uploaded images such as profile photos. | | Hosting & publishing | **Replit** | Runs the app and its database; the Publish button puts it live on the internet. | | Project structure | **pnpm monorepo** | Keeps the frontend, backend, and shared database code organized in one project. | --- ## How it fits together 1. A visitor opens the website (**React** frontend). 2. The pages request data from the **Express** server (e.g. "give me profiles to show"). 3. The server reads/writes the **PostgreSQL** database and returns the data. 4. Payments go through **Paystack**; emails go out through **Resend**. 5. When published on Replit, all of this runs automatically with a production database — no manual setup needed. That's the admin PIN — a password that protects your admin panel (screenshot 13 above). The admin panel at /admin is where you manage the app: members, verification requests, notifications, email templates, and settings. Since only you should access it, it asks for a PIN before letting anyone in. Your current PIN is: meetwell-admin Type that into the "Enter admin PIN" box and press Enter to get in. Regular users of your dating site never see this page — it's just for you. One heads-up: this PIN is currently written into the code, which isn't ideal for security once the app is live. There's already a task on your list (#8) to move it into a proper secret so it can't be guessed or found — worth doing before you launch.
    Σε απόθεμα ·Digital ·Νέο
    germany
    0 Σχόλια ·0 Μοιράστηκε ·562 Views ·0 Προεπισκόπηση
Αναζήτηση αποτελεσμάτων
Upgrade to Pro
διάλεξε το πλάνο που σου ταιριάζει
Προωθημένο

**Buy, sell, and connect with ease!**

**Buy, sell, and connect with ease!** AskJBOSS Marketplace is your trusted online marketplace for discovering great products, reaching buyers, and connecting with sellers. Whether you’re...

DO YOU HAVE SOMETHING TO SELL?
DO YOU WANT TO BUY SOMETHING?
ASKJBOSS
MARKETPLACE
🏷️
SELL
List your products
🛒
BUY
Find great deals
Buy and sell products easily. Connect with buyers and sellers on the AskJBoss Marketplace.
CLICK HERE
SIMPLE • SAFE • SECURE
AskJBoss – Connect, Share Knowledge & Grow Together https://www.askjboss.com